

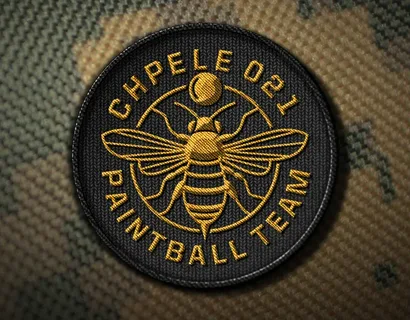

The Beginner’s Cheat Sheet to Free Online Patch Design
If you’ve never designed a patch before, the terminology and options can feel like a lot at once. This is a stripped-down cheat sheet — no long explanations, just the key facts you need before you open a patches maker online free tool and start building your first design.
Quick Glossary First
- Digitizing — converting artwork into a stitch file a machine can actually embroider.
- Perforated vs. solid material — mostly relevant for stickers/decals, not patches, but often confused with patch backing options.
- Merrowed edge — a stitched border finish that stops fabric edges from fraying.
- Backing type — how the finished patch attaches: iron-on, sew-on, or Velcro.
- Proof — a preview sent by the manufacturer before production starts, for you to approve or request changes.
The 5-Minute Version vs. The 5-Day Version
5-minute version: Open a free design tool, drop in a template, swap the text and colors, hit preview. Good enough for casual, low-stakes designs.
5-day version: Sketch multiple concepts, test an AI generator for extra ideas, refine spacing and color manually, request a proof, review it carefully, request revisions if needed, then approve for production. Better suited for business branding or bulk team orders where consistency matters.
Neither approach is “wrong” — it depends on how much is riding on the final result.
Three Design Paths, Ranked by Effort
Lowest effort — start from a template. Pick something close to your idea and adjust colors, text, and sizing. Fastest route to a usable design.
Medium effort — prompt an AI generator. Describe the concept in a sentence, get a few directions back, then pick the closest one to refine further.
Highest effort — build from a blank canvas. Full manual control over every element, best for very specific or unusual design concepts that templates and AI don’t quite capture.
Five Mistakes First-Timers Make
- Skipping the material preview. A design that looks great flat on screen can look different once rendered in thread or PVC.
- Overcrowding the design. Too much text or detail in a small patch often blurs together once produced.
- Ignoring the proof. Approving without a careful look is the single biggest cause of “that’s not what I expected” results.
- Not checking the template license. Some free templates restrict commercial use — worth confirming before using one for a business.
- Choosing backing type last. Iron-on, sew-on, and Velcro all affect how the finished patch fits real-world use — decide early, not as an afterthought.
Free Tools at a Glance
Good for:
- Testing an idea before spending anything
- Personal projects, gifts, or one-off patches
- Getting a rough visual before involving a manufacturer
Watch out for:
- Lower resolution exports on some free tiers
- File formats that may need conversion for embroidery digitizing
- Licensing restrictions on certain free templates
A Simple Checklist Before You Submit a Design
- Backing type decided (iron-on / sew-on / Velcro)
- Material previewed (embroidered / woven / PVC / leather)
- Text and logos legible at the actual patch size, not just zoomed in
- Template license checked, if using one
- Digital proof requested and reviewed before approving production
Frequently Asked, Quickly Answered
Do I need design software? No — most platforms are built for people with zero design background.
Will my screen colors match the finished patch exactly? Not always — that’s exactly what the proof step is for.
Can I reuse the same design for multiple patch types? Usually yes, though it’s worth previewing it in each material since embroidery and PVC render differently.
Where to Take a Finished Design
Once the design side is sorted, production is the part that determines whether it actually turns out well. Rush Patch’s professional patch printing and embroidery service picks up from there taking a finished design through material selection and proofing so it comes out matching what you built on screen.
Bottom Line
A patches maker online free tool handles the creative side well, especially for anyone starting from scratch. The checklist above covers the small details that trip up most first-timers — get those right, and the jump from digital design to physical patch is a lot smoother.